Kinect Window Wanderland
Window Wanderland?
Initially, when I saw a flyer for Window Wanderland I didn’t intend for this to be a Kinect project at all. I was going to do a mechanical moving background of gently rising jellyfish silhouetted with seaweed floating on the current (a fan blowing strips of tissue paper) with (probably) a penguin eternally rocking on some sort of pendulum. But that’s not what happened.
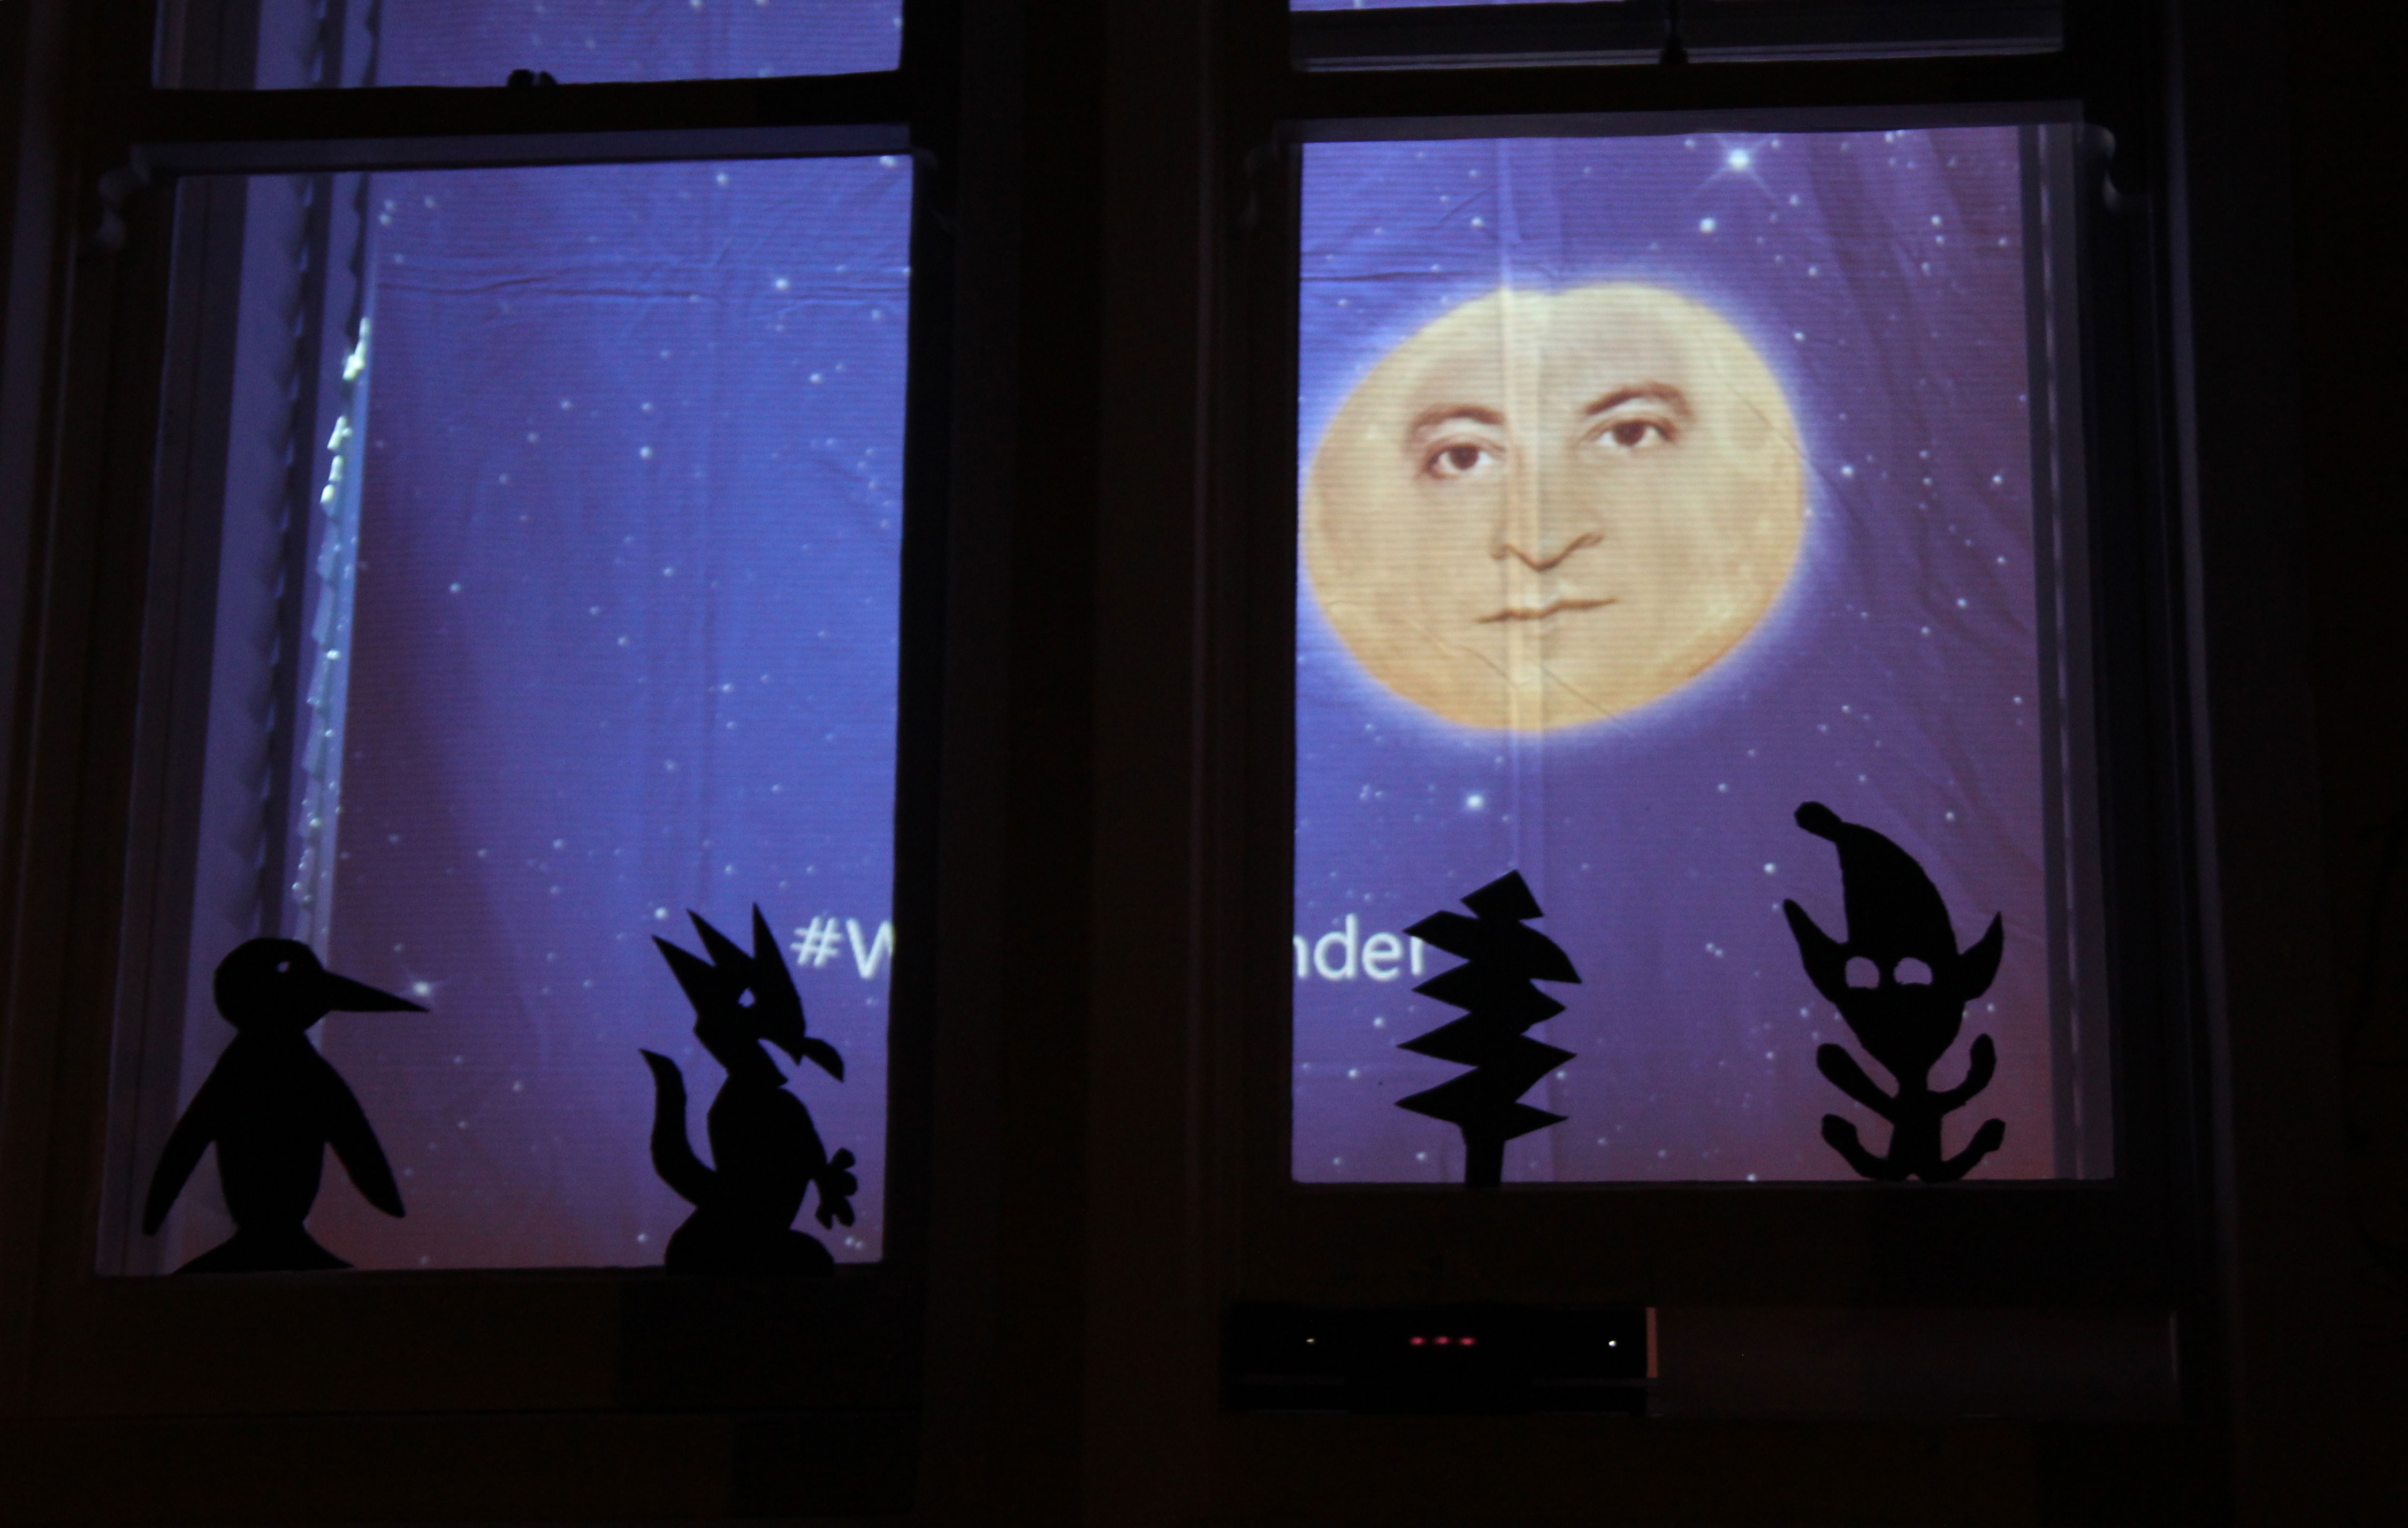
Here’s what it looked like in the end, there are some videos at the bottom after all the words.
I’m a great believer in serendipity and a tweet from my colleague Mike Taulty led me to a new experiment that he’d done with the Kinect Face Tracking API and I simply joined the dots.
At that point, I treated this project like a hack, partly in preparation for a hackathon that I’m supporting in a few weeks time and partly so I didn’t run away and spend too much time on it. I decided to see how much you could reasonably expect to accomplish in a short amount of time with the Kinect SDK on your own.
From the start I made myself aware of how the end product would need to be demonstrable. I had to be able to show a clear output for the time and effort I put into it, and here was an interesting proposition. Getting the balance between 1) functionality 2) usability and 3) polish is tricky.
- If something doesn’t function, if it simply doesn’t work, then it’s failed, no-one will use it, it’s a dead end. Do not proceed to point 2.
- If it’s not usable then I’m not going to try it again, and importantly, I’m not going to recommend that someone else tries it either.
- If it doesn’t feel polished, it’s not going to excite me. The polish, or finessing as I often refer to it is the bit where you can get an emotional attachment. That’s where people smile. That’s where you get delight.
So bearing this in mind, I gave myself 2 days which I split into 6 cycles / evenings of work. Whilst I did try and work to the 6 x 3 hour cycles, I was afforded the luxury of those cycles being split over a period of 2 weeks so I had plenty of brain time to consider my next move and take considered inspiration from each of my cycles. And in fact, if one of the lessons I learnt in this was that time to reflect and accept changes to the original vision over those 2 weeks was really valuable.
Cycle 1 – Does this thing have legs?
I took Mike’s project from his site. Unzipped it, opened the solution in Visual Studio and couldn’t get it to run. I faffed about with connections and making sure that the camera was working properly, turned out that I didn’t have the most up to date version of the SDK installed and by the time I’d figured all of that out and updated and restarted my machine I’d wasted an hour. Lesson learnt. Check for updates.
Once I saw it running, I took a look at how he was calling in the images for the face in his code whilst cross referencing with his blog post for clarity. That was 20 minutes of ‘getting to know the project’ that meant my head was in the right place to start taking it apart and adjusting for my own purposes.
I wanted to take the Window Wonderland theme of ‘magical’ and make something that would interrupt people who thought they were not interested, and make them interested, and make them smile.
So the next step was to change the image of the face from the demo and see what effect simply swapping out images would have – I did a Bing image search for moonface. It seemed to work so I cut out the camera’s RGB stream and dropped a black background on it and had my face tracking moon. I then spent an hour Photoshopping the images so they would work with the states that I already had running. With hindsight this was probably a waste of time but in the back of my mind I was wanting to test the contrast of the bright moon against a dark background – how dark is black when projected? The projector’s bulb is surely going to throw out some light? I also wanted to check how crisp the transparency was on .png files visually – I was thinking about the transparency on the outer glow round the moon.
Cycle 2 – Can this thing actually see?
The next cycle was about the physical set up. I had this working crudely at my desk but didn’t know how it was going to perform in my proposed environment, so before spending any effort looking at what the actual behaviour was going to be and the visual representation, I had to put it in my window.
With a Kinect installation, the environment is incredibly important. Where is the screen? Where is the computer? Where is the power? Where is the Kinect camera? Oh, the camera is behind glass is it, so how far can it see through the glass? How far can it see people at all? What happens if a small person (child) walks past. What happens if a really tall person walks past? What happens if a person in reflective clothing with a cycle helmet and flashing light on top walk past it? What is going to happen!!?!?!?!
Well, I didn’t want to shatter my plans at such an early stage so I settled for checking the basics. I put the camera on a tripod inside my house, looking out the window and placed my laptop on a sofa that sits in the bay window so I could see it. I then spent 30 minutes walking in and out of my house, moving the camera about, checking how it behaved through the glass, outside the glass. What you should take from this is that all of these checks need to take place ‘for your specific environment and your location and your setup’.
Cycle 3 – Knowing what I know, what do I know?
Now I knew that I had a good use case and that I could see confidently see people outside, I’d learnt a few things too:
- I needed to consider placement of people’s faces on the screen depending on how tall (child/adult) they were, where the projector/screen was and the sensor was. All those things had to be adjustable until I had the final environment
- there is a sweet spot where it works really well, depending on distance from the Kinect sensor. I would need to channel people within the right area & position the sensor accordingly, or be able to influence that sweet spot in code.
- I hadn’t tested with more than 3 people. I needed to test with between 1 and 8 people. Walking from both directions. What would happen if there was a large crowd of 20 people? Kinect Studio will surely help here – investigating that and getting that running will likely take a few hours.
I decided that I was here:
- Function – 70% sorted
- Usable – 50% sorted
- Finessing – 10% sorted
The functionality and usability would be influenced by the final graphics so I decided to create my own assets for this. 2 main graphical elements I wanted to make unique. The face. The background.
For the face, I’m going to photograph my own and style it accordingly. I looked at what my options were from the face API and decided that my user scenario is going to be:
[someone walking past, see projection in corner of eye or is looking for it]
LookingAway – a blank face (I see your movement)
Engaged – when they look, the face (eyes, nose, mouth) appear
Happy – when they smile (because they see that it is themselves) the planet smiles
LeftEyeClosed / RightEyeClosed – blinking (further reinforcing that this is themselves)
MouthMoved – trigger a cartoon style telephone sound
I then hope they’ll play for a few moments, dance about, take a picture and move on.
Next steps:
- Background animation
- Face pictures and Photoshopping ( + app asset images)
- Check hardware – do you get more stability (smoother frame rate) with better GPU?
Cycle 4 – Moon Face / Spoon Face
I decided to spend some time working on an image for the moon face, so far I’d been using an image that I’d ‘borrowed’ from the internet and I didn’t want to be infringing on anyone’s copyright so I took a few pictures of myself and worked them in Photoshop into the images that I thought I needed.
This part I should have spent more time on because I didn’t get the photos that I really wanted out of it so I ended up compromising functionality based on the images that I had. Here’s what I ended up with. It took time, too long and as such I didn’t find time to animate the background as I’d wanted to. Shame, but hey…

After spending probably more than my 3 hour allocation getting these together, sized up correctly and dropped into the Visual Studio solution I realised that I should have used someone else’s face. Or one of my kids. Or from a doll or something. Having me bouncing around the screen felt a little creepy and narcissistic. But it was too late to change that now. Doh.
Cycle 5 + 6 – Set-up, tweak, breakdown, tweak, set-up, tweak, breakdown.
So here again, this took a lot longer than I had anticipated. Most of the time spent was physical rather than in front of a screen. I’d not set up a physical environment like this in a while and the nature of what I was trying to do meant that the projection space started to dictate how it worked. The first time I set this up I tied a bit of string across the top of the window and hung a bed sheet over it. This was to make sure that the scale of everything worked and that it was visible from the outside. I had issues with the shutters on my windows and because they’d been properly fitted by a man with real carpentry skills I didn’t want to start taking them apart as I wasn’t sure I’d get them back up again so I had to work around them.
On the first set-up someone from the BBC came round and shot some video which made it onto the BBC website. This was a useful test as it gave me the opportunity to see what happens in the dark and when multiple people start to interact with the projection.
At this point I took the time to tweak the positioning of the Kinect camera and the positioning of where it drew the images onto the canvas. I also reduced the size of the images that I was using, if there was only one person in front of the camera then a large moon looked great, however with 2 or more people it looked better smaller.
Setting up the screen and taking it down took ages. I would have liked to have had more time to do this part too and looking back, I’d say that 40% of my time was spent on setting up the screen and projector, testing the projection in situation, responding to how it behaved with multiple people and making changes based on all these factors.
Final result
On the night I was pretty pleased with how it worked. There was plenty of laughter from the children (and some adults). I noticed a few people had decided to drive round so they stopped in their cars outside and looked confused as the sensor didn’t ‘see’ that far. Here’s some video of it in action:
Gallery
This wins the Window Wander. Bravo @andspo https://t.co/kthmeG2n7W”
— Best of Bristol (@BristolBestof) February 7, 2015
More behind the scenes from @windowwander #Kinect #windowwander #windowwanderland https://t.co/nvQJ8dB0TT
— Andrew Spooner (@andspo) February 7, 2015
Thanks
Thanks to Alex Murray and Mike Taulty for their help and input with this project.